This article will show how I setup autocomplete, in VSCode, using local LLM with minimal hardware requirements. I find autocomplete to boost my productivity as I don’t have to spend energy on boiler plate code such as scaffolding html tags structure.
Additionally, Docker is a great way to avoid clutter due to dependencies and is something that I also use to automate my integration tests.
What we’re aiming for
Furthermore, when working on new ideas, I prefer a workflow which lets me get to the new idea part as soon as possible and without sacrificing too much energy on repeating boiler plate code which is often necessary to get things of the ground. This is where I find autocomplete functionality to really shine.
However, I also prefer things private and cost effective. Let’s have a look at we’ll be doing in order to have our own, private, LLM to get that productivity boost going without leaking our code across the word wide network.
Contents
- Hardware spec I’ll be using
- Which models I currently run
- Installing docker
- Setting up Ollama and running the models
- Configuring VSCode and trying out our local LLM
- Summary
My hardware spec
I am using an older HP Z-book which has a Nvidia Quadro T1000 Mobile GPU acting as a support card for the integrated Intel graphics card. The Nvidia GPU has a total of 4GB of VRAM which makes it a modest setup regarding hardware.
Furthermore, my laptop has an SSD drive and 32GB of RAM.
Models I’m running as local LLM
We’ll be using two models, one for general chat and the other will be for autocomplete. Admittedly, I do not care too much for the chat and may not be using the best model for this and if you sit on better hardware than me then you might want to experiment with one of the bigger models for autocompletion of code.
In any case, I’m using Ollama 3.2 model for chat and Qwen 2.5 Coder for code auto-completion as I’ve found these models to provide a good enough developer experience on my laptop. With that out of our way, let us get started!
Installing docker
I prefer not to clutter my machine with various dependencies. Which is I why we’ll isolate Ollama, and it’s dependencies, neatly using docker. That means you need to make sure to have docker installed and able to run docker-compose files.
You can follow this guide on how to install docker.
Setting up Ollama and running our local LLM
Although you can run these models using CPU and RAM only, I would recommend you to make sure your GPU drivers are enabled if you have a card such as Nvidia. Albeit configuring Nvidia drivers is out of scope, it should be fairly easy to search the internet for a good guide if you need it.
In either case, we’ll need to clone the following GitHub repository
git clone https://github.com/mythrantic/ollama-docker.gitNavigate into the cloned directory and if you have you’re GPU configured then you run the local LLM like this
docker compose -f docker-compose-ollama-gpu.yaml up -dOtherwise you can run the local LLM this way
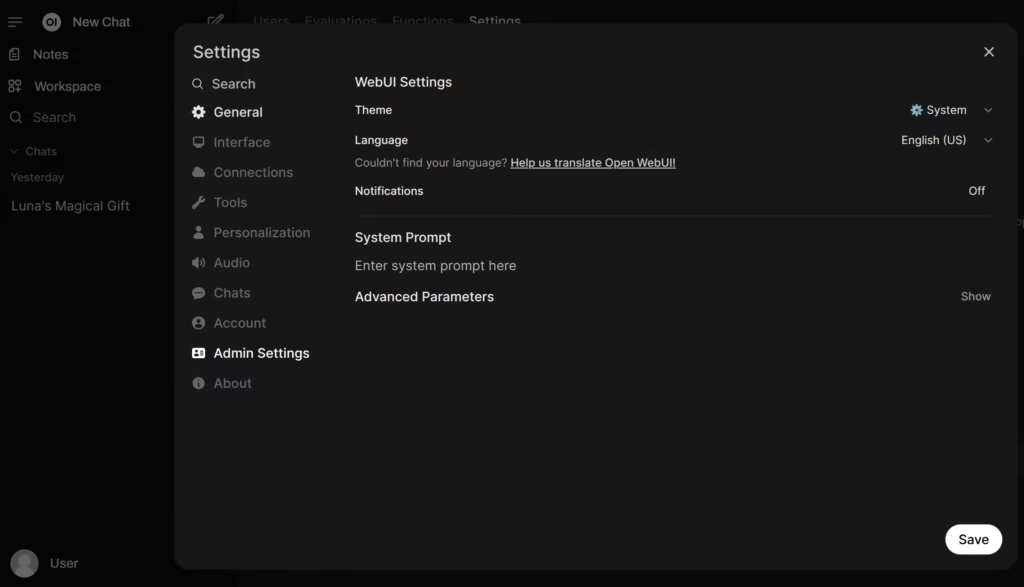
docker compose up -dFinally, we’ll need to make sure we download our models. This is easily done through UI by pointing your browser to http://localhost:8080.
Once there, head over to Settings -> Admin settings
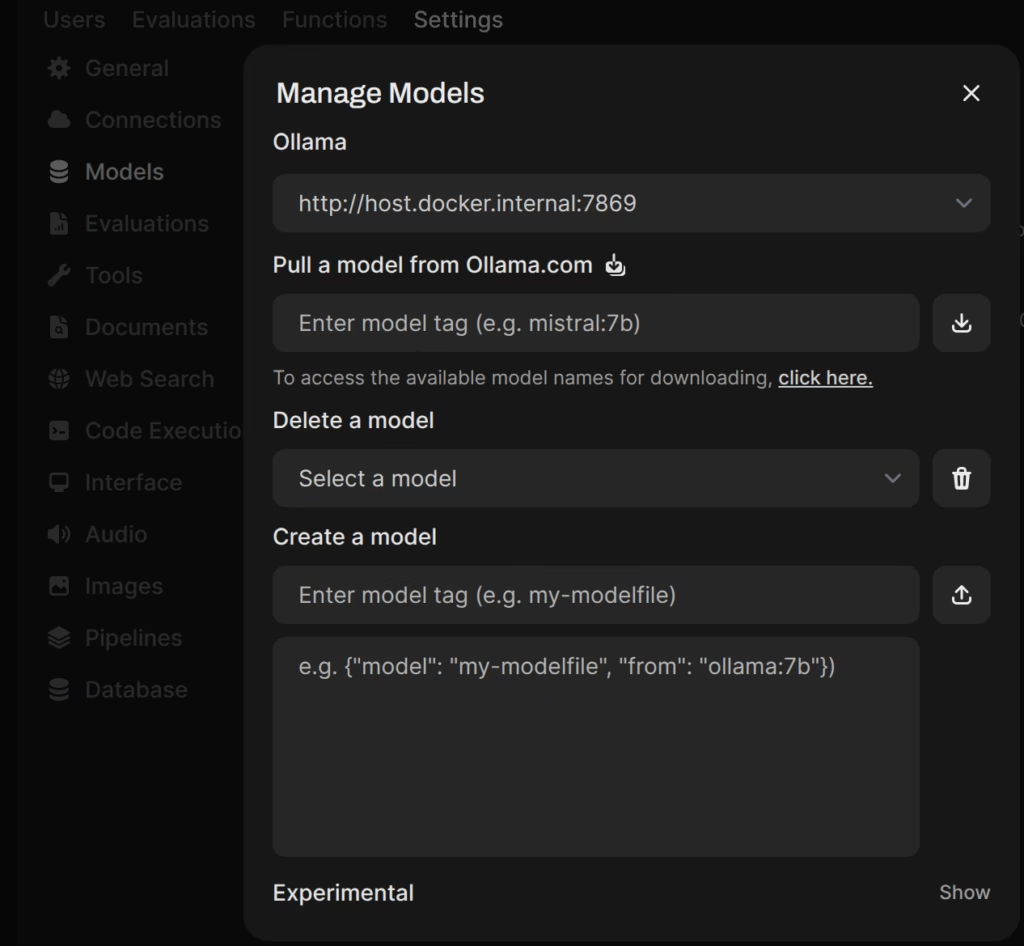
Head over to Models section to manage and download the models. Inside the below screen sequentially download qwen2.5-coder:latest and llama3.2:latest.
Configuring VSCode and trying out our local LLM
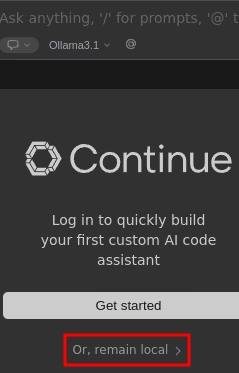
For my VSCode setup, I will be using Continue extension to enable code autocompletion using our local LLM’s. So start your VSCode, navigate to the Extensions tab and install Continue.
Once installed, your extension should pop up in the VSCode side bar so head over there and configure it like so
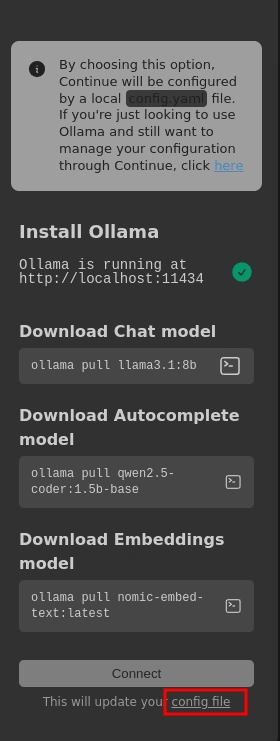
Once there open the config.yaml and locate the models property. Then paste in this following so that part looks like this
name: Local Assistant
version: 1.0.0
schema: v1
models:
  - name: Llama 3.2
    provider: ollama
    apiBase: http://localhost:7869/
    model: llama3.2:latest
    roles:
      - chat
      - edit
      - apply
  - name: Qwen2.5-Coder 1.5B
    provider: ollama
    apiBase: http://localhost:7869/
    model: qwen2.5-coder:latest
    roles:
      - autocomplete
context:
  - provider: code
  - provider: docs
  - provider: diff
  - provider: terminal
  - provider: problems
  - provider: folder
  - provider: codebase
Save the config file along with all settings changes for the extension. Some times it might need a bit of time to activate the GPU, which again depends on your hardware, but start writing some code and verify that autocomplete starts presenting suggestions.
Summary
You should now know how to set up your own environment for local LLMs using Ollama as well as configuring various local LLMs to boost your code writing using VSCode.
Autocomplete is a great way to keep your coding momentum up as you’re not being slowed down as much writing daunting boiler plate code and this way you can do it on safely on your own premises.
Thanks for reading! If you liked this article, consider subscribing to my newsletter for more articles that will teach you how to get most for your money 👇
RELATED POSTS
View all